
How to track conversions via RedTrack
For every advertiser, it is crucial to keep up with the statistics of their campaigns, especially conversions. Conversions are actions that you want the user to take. If your goal is that the user should buy the product you’re promoting, every time someone does, you get one conversion.
To track conversions, you need to use macro commands, so you need tools such as a RedTrack platform.
RedTrack.io a tool for tracking ads and conversions. Helps merge ad data across all channels. This way you will know whether the actions you take in promoting your product are profitable or not, will help you make more money and better understand your audience.
When you register, you get a free trial for the first 14 days, after which you pay $49 per month to use RedTrack. During the trial period, you do not leave any data from the card, as is the case with some other platforms, which will forcibly withdraw money from you after the trial period. After the promo period, you will no longer be able to access the profile. If you are interested in continuing to use, pay $49 and the platform will return you to your profile.
Which macro commands are supported by the Ad Nativia platform?
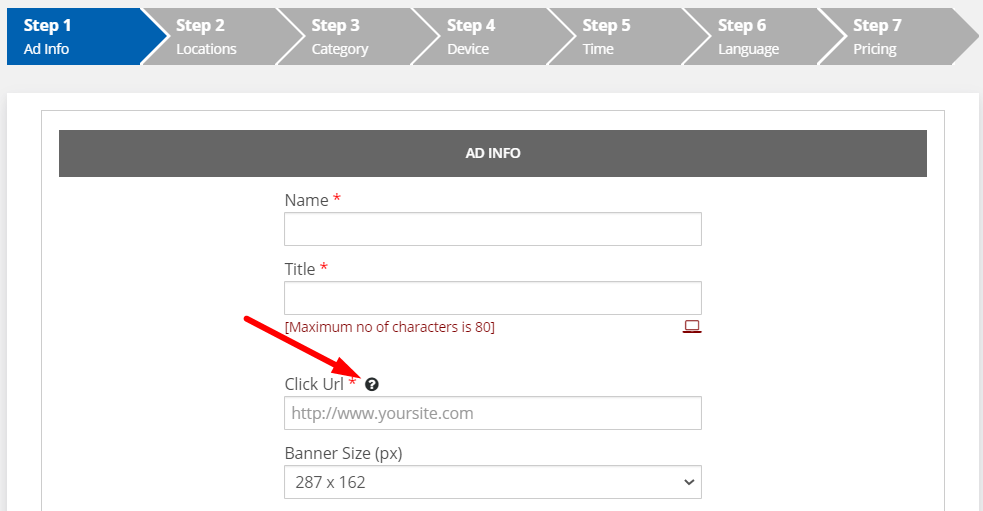
As you create or update your campaign, you can see for yourself which macros Ad Nativia supports. On Step 1, next to click URL, you will notice a small question mark. If you just get the cursor to this icon, you’ll get a list of macros that we support.
Basically, our network supports the following macro commands:
- {CAMPAIGN_ID}
- {USER_IP}
- {COUNTRY}
- {DOMAIN_ID}
- {DOMAIN_ENC}
- {PUBLISHER_ID}
- {PLACEMENT_ID}
- {CLICK_ID}
- {CLICK_COST}
How do I connect RedTrack and Ad Nativia?
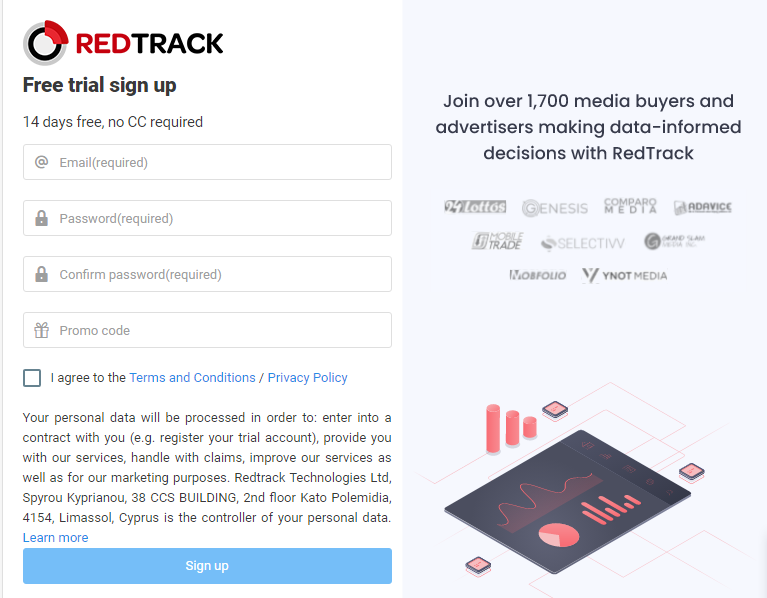
If you are already an advertiser on the Ad Nativia platform, the next step is to create a profile on RedTrack. You can do this by clicking on this link. A window opens for you to enter the basic data.
After registration, an activation link will arrive at your e-mail, through which you need to log into your profile.
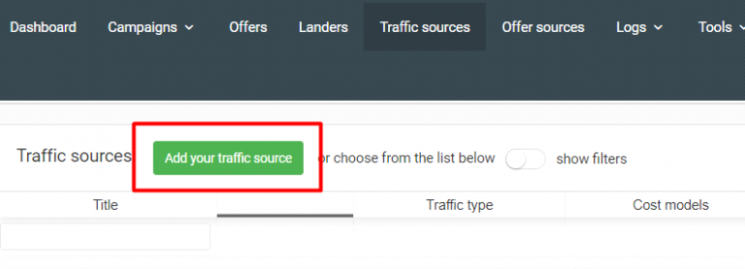
You will then add Ad Nativia to your traffic source. Go to TRAFFIC SOURCE, and then click NEW:

Click on ADD TRAFFIC SOURCE
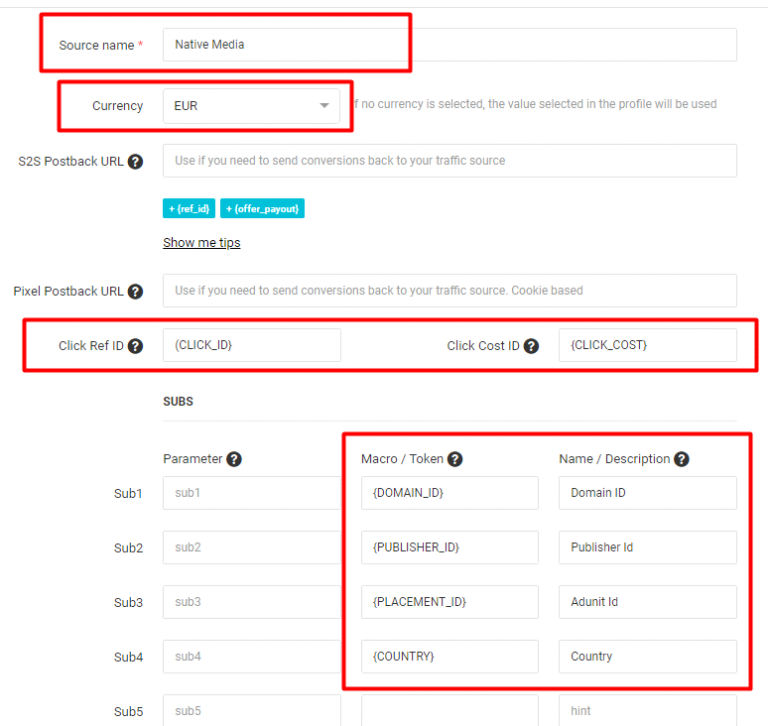
Add the Ad Nativia platform as a traffic source by entering a few data: name (Ad Nativia ), currency, and several macro commands of your own desire. We suggest that you must enter {PUBLISHER_ID} and {DOMAIN_ID} because they have proven to be the most useful.
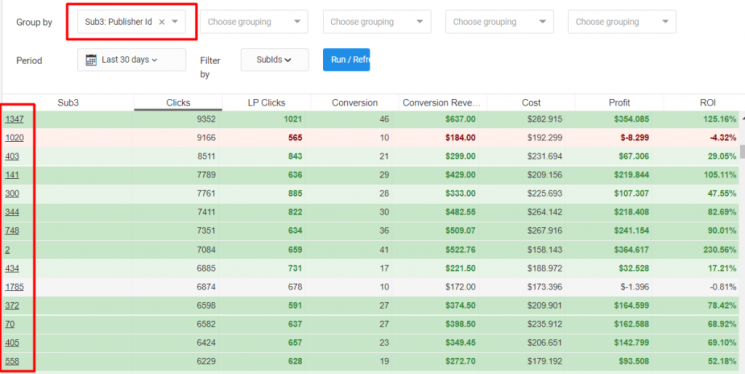
This is how you connect RedTrack and Ad Nativia, so you can now track which publishers have the biggest number of conversions.
Okay, it’s been a few days. How do I increase conversions?
Now that you know which publishers are bringing you the most conversions, you can use the TRAFFIC FILTER option. You will see this option as you create or update the campaign, on Step 1.
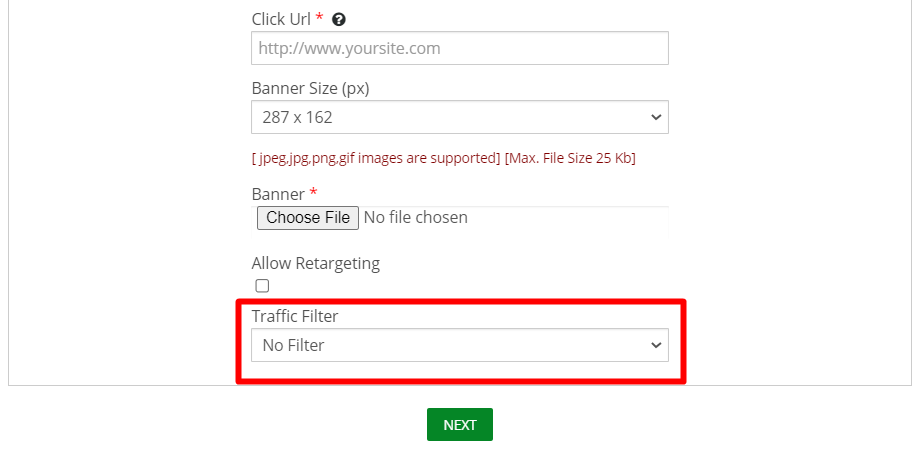
You have three options here:
- No filter
- Whitelist
- Blacklist
Let’s say you choose Whitelist. The following fields open for you:
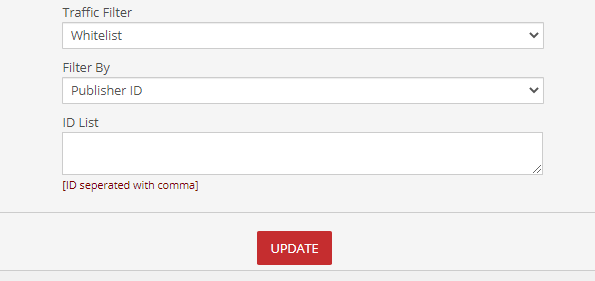
Check out at Redtrack which publishers have brought you the most conversions. Enter their ID numbers in the ID LIST field. Separate ID numbers with commas. When you are finished entering, click UPDATE.
If you choose Blacklist, fill it in the same way. In Blacklist, you type the ID numbers of publishers that did not bring you the conversion number you want. When you choose Blacklist on Traffic Filtering, your campaign will be displayed to all publishers except those on the Blacklist.
We suggest that you do not use the traffic filtering option as soon as you create a campaign. Wait at least two weeks and then check on Redtrack which publishers are most successful for you. The situation often changes and if you form lists right at the beginning, it can happen that you unfairly blacklist a site, and later it turns out that it could have brought you more conversions than you expected.

