
How to create a new campaign
Log into your profile!
On the menu on the left, click the ADS field, and then create AD! A field will open for you to fill in the data for your new campaign!

Filling data goes in the following order:
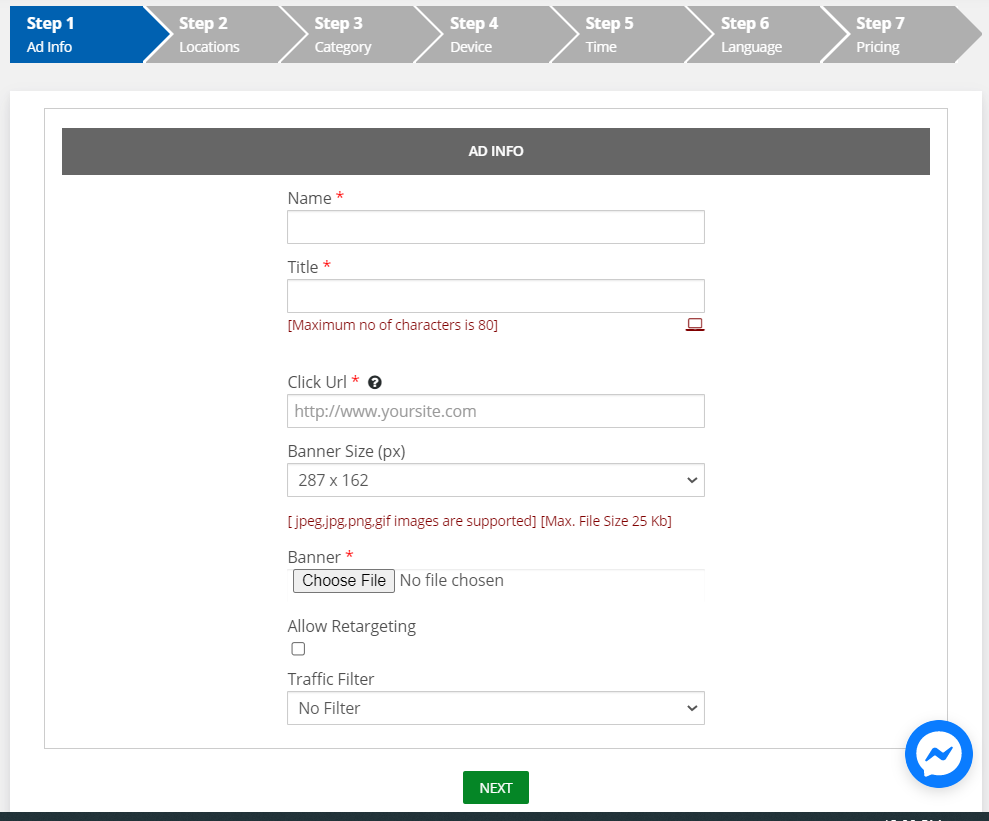
STEP 1 – Ad info
- Name – type your own internal campaign name. For example: ad 1, product name promoting, etc.
- Title – type the title of the ad that will appear on the websites of our publishers
- Banner size – banner image size. Two sizes are available: 287 × 162 and 140 × 140
- Banner – insert an image for your ad from your computer. The image will be displayed on our publishers’ websites with the title. So the picture and the title are what your audience will see
- Click URL – Here goes the link to your website
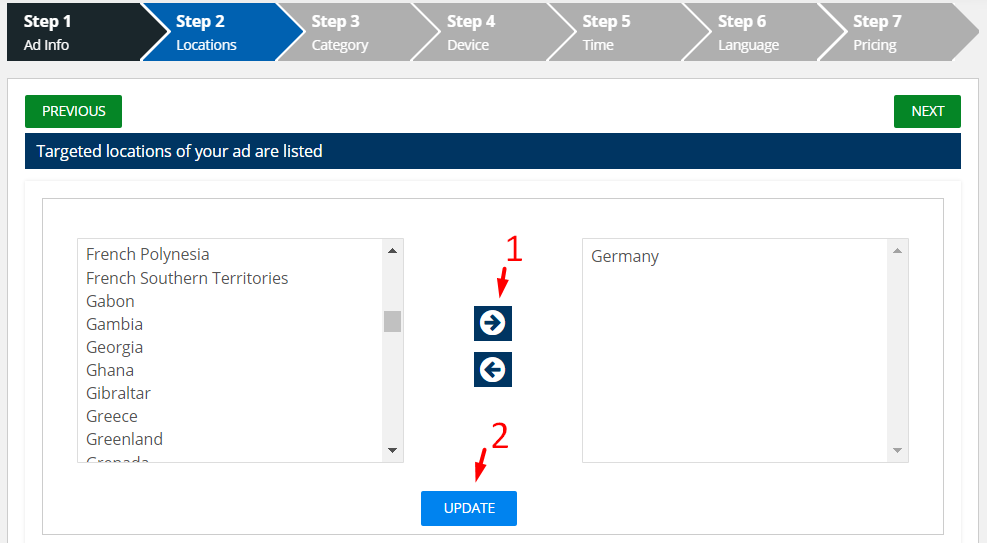
STEP 2 – Locations
On this step, you select the country where the ad will be displayed.
Find the country on the menu on the left. Mark it with the cursor, and then click the arrow next to it that points to the right. The country you marked will switch to a box to the right (as in the image). When you click UPDATE, targeting is complete!
If you have chosen the wrong country, it can be easily corrected. Mark the wrongly selected country with cursor, click the arrow pointing to the left, and the country will return to the left menu. Then choose the country you want, click the arrow pointing to the right again, and the country you want will switch to right box.
Only at the end, be sure to press UPDATE so that the platform remembers your changes.
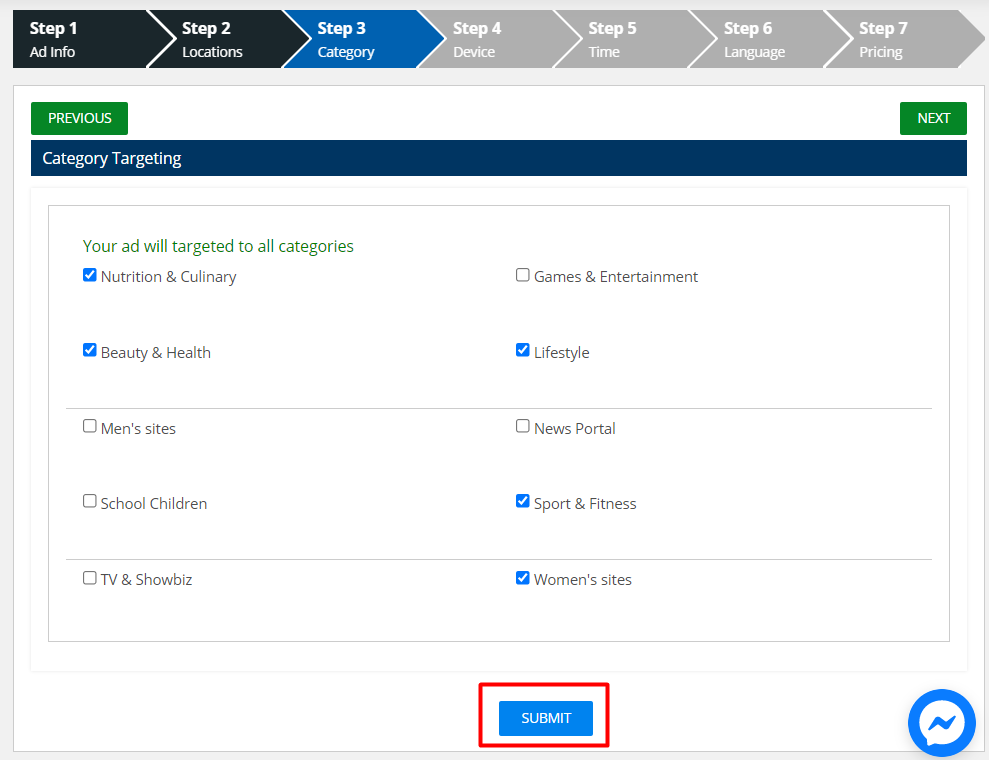
STEP 3 – Category
In this step, you select the category of sites where you want your advertising to be displayed. If you’re promoting weight loss products, you can mark the Beauty & Health category.
We suggest that you skip this step and allow your ad to be displayed on all possible sites. Because people who would like to lose weight visit also news portals and websites about culinary and nutrition, etc.
Of course, in case you think that it would mean that the product is promoted exclusively to people with certain interests, you can highlight the category and click on SUBMIT below.
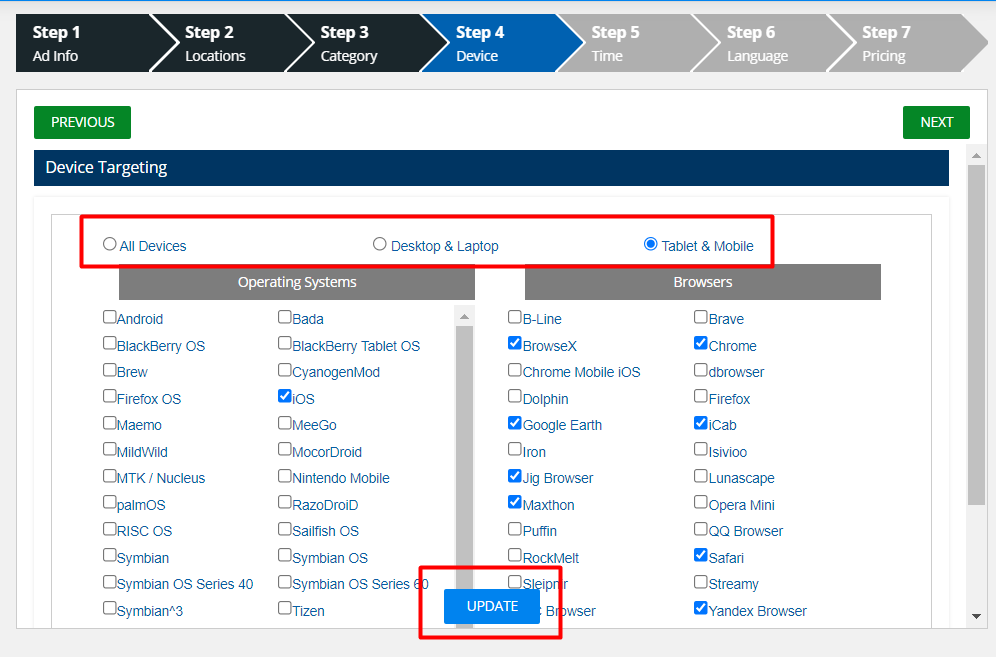
STEP 4 – Device
On step 4, you can set up devices where you want your ads to be displayed.
You can choose a phone, tablet, desktop PC. You can also select the operating system and browser.
In case it’s not necessary, we suggest skipping this step. If you’re marking something, click UPDATE at the end!
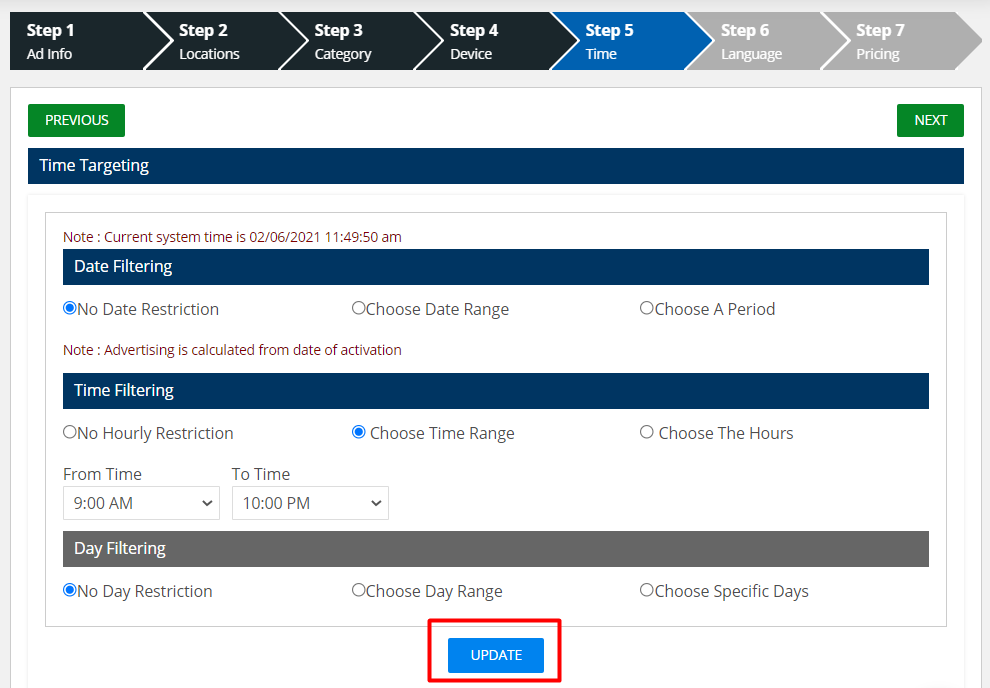
STEP 5 – Time
Here you can mark the period in which you want your advertisement to be displayed: date, time, certain days of the week.
Some advertisers know the time when their target audience is online and want their advertising to be shown right during that period. When you are finished marking, click UPDATE!
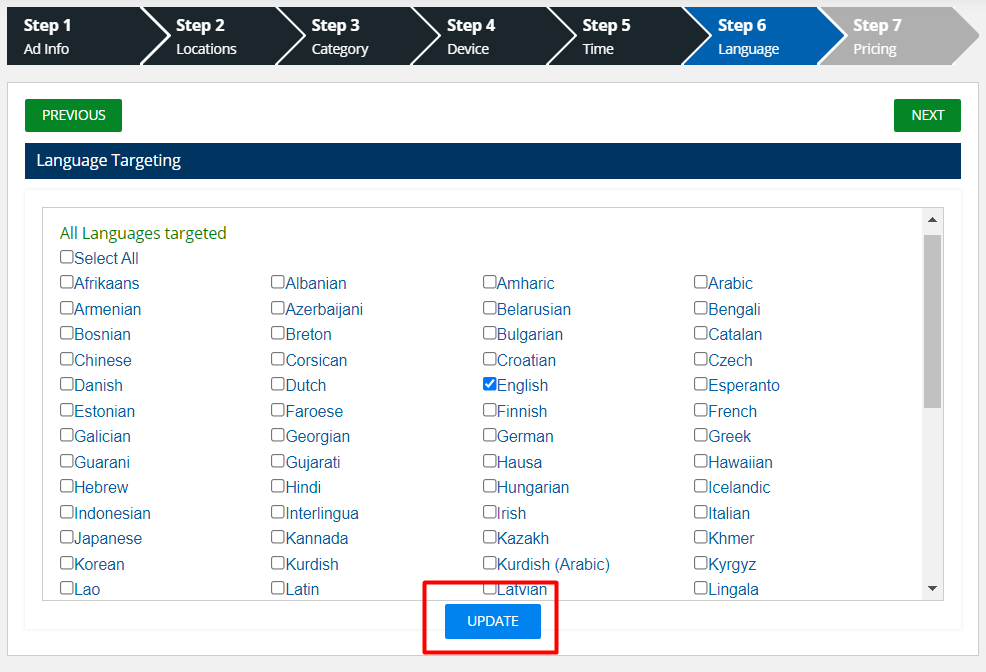
STEP 6 – Language
Target the language you want.
After you mark the languages, click UPDATE.
STEP 7 – Pricing
Mark whether you want your ad to be displayed on top, low or middle publishers’ websites.
We have three kinds of publishers. The TOP group includes publishers with better quality content, more visitors, and there are not many advertisements on their sites. They also pay a higher price for a click, but it is also more likely that their audience will buy a product or service.
Middle and low categories have fewer daily visits and more advertising on their website, so the price of clicks is lower there.
We always suggest that you mark all three categories so that your advertising is shown in as many places as possible.
Be careful not to make mistakes while typing the price. For example, sometimes advertisers type 0.25 instead of 0.025. If you want to pay 2.5 cents per click, enter 0.025.
Enter how much you plan to spend for advertising. You can also set up how much money you want to spend for advertising on a daily basis. The minimum budget must be 5 euros and the daily budget must be 1 euro. Finally, confirm everything on UPDATE!
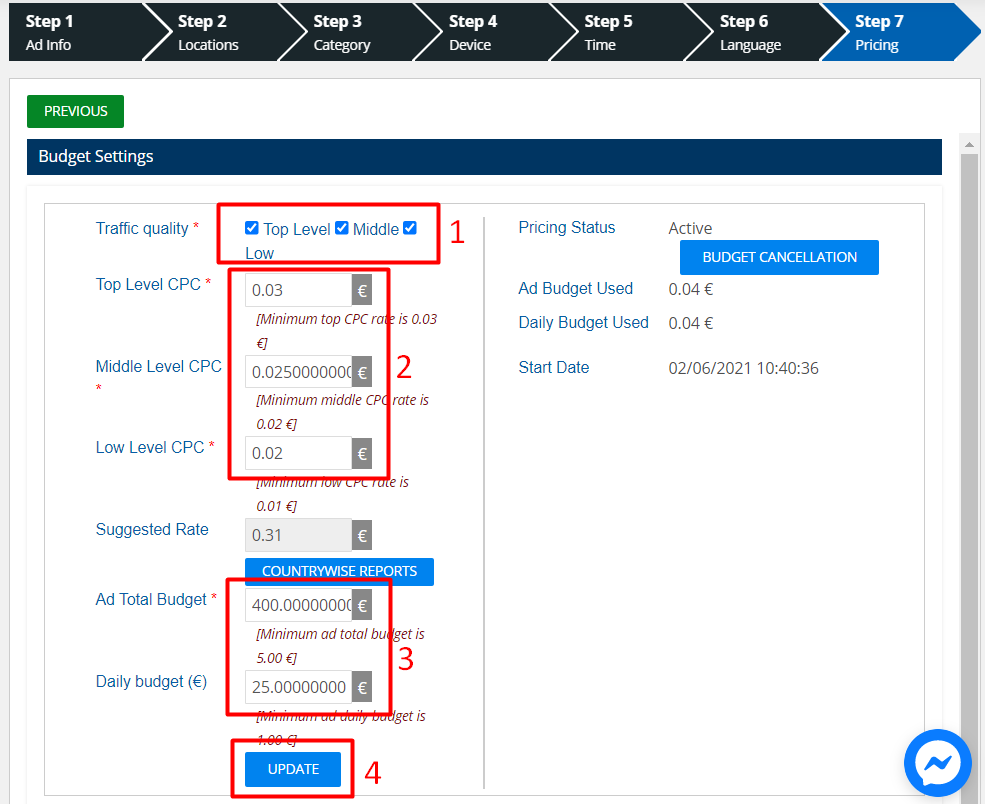
After you click UPDATE, your advertisement is reviewed and approved. Our operators will release it as soon as possible.
If you change your mind and decide to delete your ad, do so via the BUDGET CANCELATION option, which is also on step 7.
Then, on the menu on the right, click on MANAGE ADS, where a list of your ads will open. Next to each ad is a delete icon. Clicking on this icon deletes the ad.
The ad won’t be deleted if you haven’t canceled the budget.
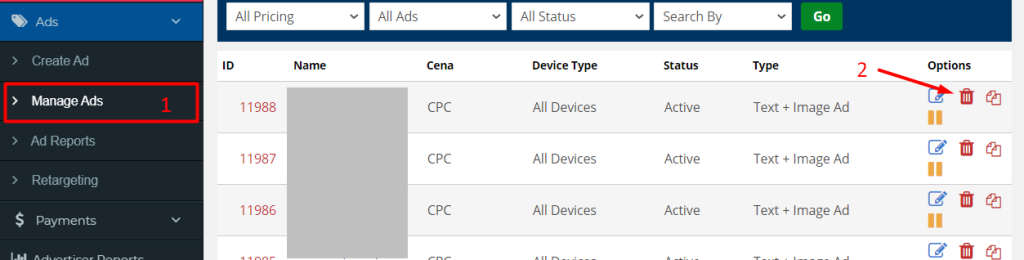
If you don’t want to delete a campaign but only correct it, left of the delete icon is the campaign update icon. After you change the data, be sure to click UPDATE and wait for our operators to approve the ad again.
The ad can be updated at any time during the campaign.
Once the advertising budget is spent, you can simply delete the campaign, or you can reactivate it by filling in step 7.
For any additional questions, write to us on [email protected].

